
Planning your build
Heat recovery ventilation: when should you plan it during a house build?
The Ventiar team
Published: · Updated:
Plan heat recovery ventilation while choosing or adapting your house design, before floors or ceilings close the space needed for ducts. Duct installation, fitting the unit and commissioning happen at different stages, depending on the duct routes and the construction schedule. Start with a current floor plan and a list of decisions to agree. This guide takes you from an initial sketch to questions for your contractors, whether you are choosing a house design or the walls are already up.
When should you plan HRV, and when should you install it?
Divide your preparations into three parts: the system layout, duct installation and commissioning. For each, write down what needs to be decided and by when. This turns “when should we install HRV?” into a schedule for your particular build.
Start with space for the unit and possible duct routes. Then agree with the installer which tasks must be finished before screeding and which before closing ceilings. Separately agree when the unit will be installed, the conditions for starting it and the measurements required. Buying the unit does not have to be the first task on your list.
- House design: agree space for the unit, ducts and duct penetrations.
- Before structural floors are built: check that the design includes the required openings.
- Before screeding or closing ceilings: install and inspect the ductwork that will be concealed there.
- Before use: commission, balance and measure airflow.
Choosing a house design? Check the space for ventilation
When looking at floor plans, you probably focus on the kitchen, living room and bedrooms. Add ventilation to that list. Ask which system the design includes and what needs to change if you choose HRV. A room labelled “utility room” does not guarantee enough space for every appliance and its connections.
Try this: mark the proposed unit location and the rooms furthest from it on a copy of your plan. Ask your designer to show possible duct routes. Do they pass through a corridor? Do they require a lowered ceiling? Can they connect to the upper floor? This discussion is more useful than choosing a unit solely by the floor area of the house.
Early planning also helps with interior decisions. If you want an exposed structural ceiling or maximum living-room height, explain this before approving duct routes.
Structural work: what should you agree before floors and other services?
If the walls are already up, compare the drawings with the actual layout. Changes to walls, ceiling heights or room uses can affect ventilation assumptions. Share updated plans with everyone coordinating the building services.
Openings in structural elements require agreement with the structural designer. A duct layout is not permission to drill through a beam or structural floor. If an opening is missing, agree an acceptable solution before commissioning the work.
Bring three questions to your contractor meeting: where might services clash, who confirms the final opening locations, and when are decisions needed? Record the answers on one current plan so every trade works from the same version.
Should HRV go in before or after screeding and plastering?
First establish where the ducts will run. If they occupy designed floor layers, coordinate installation before those layers are closed. For ducts below structural floors, ceiling installation and access to the void are the key milestones. Simply saying “before plastering” or “after plastering” is not enough to build a schedule.
Ask how open ducts will be protected from dust and what checks will take place before concealment. Photograph the routes and record changes from the design. This makes it easier to locate ducts when lighting or joinery is installed later.
Allow space for the required duct insulation as well, particularly where ducts pass through unheated spaces. Agree its extent and thickness with the designer before closing floors and ceilings.
Do not use the ventilation system to remove construction dust. Agree when to commission it after dusty work is complete and the cleanliness of the system has been checked, taking account of the conditions in the selected unit’s installation manual.
For example, you plan a suspended corridor ceiling with recessed lights. Before ordering that work, compare the positions of lights, ducts and ventilation terminals. Coordinate the available space now, rather than when inspecting the finished ceiling.
Where should the heat recovery unit go?
Mark one or two locations on your plan to discuss with the designer. For each, note the available space, how you will reach the unit, where connections will fit and where ducts will leave it. If you are considering a loft or small utility room, ask for an assessment of operating conditions and maintenance access before approving the location.
Draw the maintenance space as well as the unit footprint. Imagine replacing the filters after shelves, a washing machine or cupboards have been fitted. If other equipment blocks access, reconsider the location with your designer.
Check the selected model’s manual for requirements concerning room temperature, electrical supply and condensate drainage. If a drain is required, plan its route and allow space for the appropriate connection before boxing anything in. Do not assume that every heat recovery unit has the same requirements.
Is it too late to add HRV to a finished house?
Not necessarily, but the options need assessment on site. Ask about available duct space, boxing-in and alterations to the building. Do not assume a new-build layout can be transferred unchanged to an existing home.
Prepare an up-to-date floor plan, photographs and a list of features you do not want to alter. Ask the installer to explain the possible options and scope of work. An online tool cannot inspect hidden services or the condition of the structure.
Checklist for your designer or installer meeting
You do not need every answer in advance. Use this checklist to separate confirmed information from decisions requiring professional assessment. For each item, record the decision and who will confirm it.
- Current floor plans with room dimensions and ceiling heights.
- Room uses and expected number of occupants.
- Proposed unit location and maintenance access.
- Temperature conditions, electrical supply and any condensate drain required by the unit’s manual.
- Space for ducts with the required insulation and acceptable boxing-in locations.
- Openings requiring agreement with the structural designer.
- Proposed outdoor intake and exhaust positions for designer review.
- Fuel-burning appliances, fireplace and cooker hood to coordinate with ventilation.
- Dates for installing and inspecting ducts before concealment.
- Protection against construction dust and commissioning conditions after dusty work is complete.
- Documentation, balancing and measurement requirements at handover.
Have a floor plan? Prepare your first layout in Ventiar
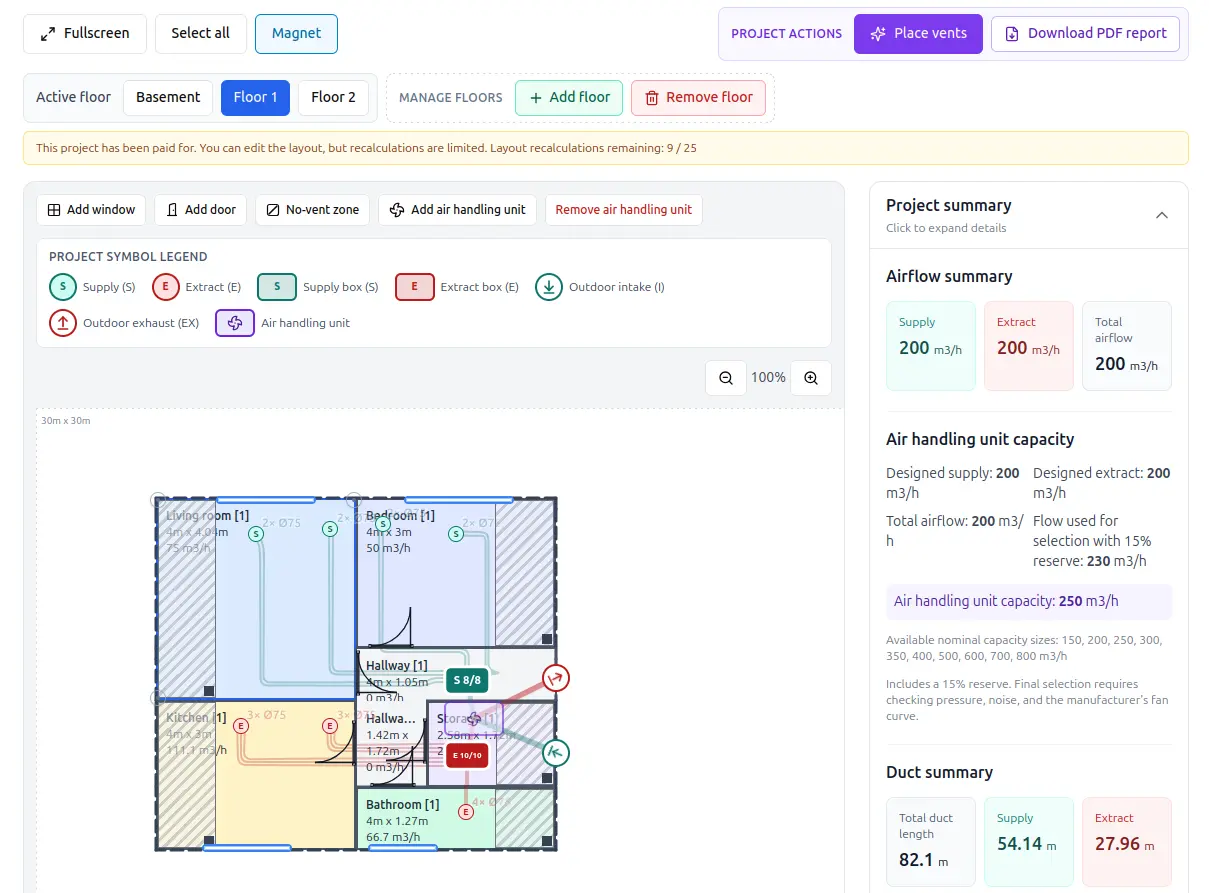
Start with what you know: your rooms, their dimensions and their uses. In Ventiar, you can recreate the layout in your browser without an account. Get familiar with the editor before deciding to buy.
Saving to an account requires registration. Paying for the selected project unlocks vent placement, airflow calculations and suggested duct routes. View the sample report and check current pricing and terms before buying.
Use the result for further work and discussion. It does not replace structural assessment, checking clashes on site or measuring the completed installation. Begin with your home layout and confirm installation decisions with a professional.
Frequently asked questions about HRV installation timing
Do I need to buy the unit at the start of the build? Early planning does not mean purchasing immediately. However, the intended unit’s specifications and dimensions must fit the design, so agree any later model change with your designer.
Is a weather-tight shell too late? Not automatically. First check the space for the system and the existing openings. The changes needed depend on the individual home.
Can I start planning without a complete ventilation design? You can collect information and prepare a room layout. That is the start of the process, not a basis for making structural openings or ordering the whole installation.